Reading a New Piece

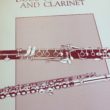
Where to start when taking a look at a piece for the first time? Obviously there are as many approaches as there are musicians, and different pieces call for different attention. For an example, let’s take a look at the Duos for Flute and Clarinet by Robert Muczynski. (I’ll be performing this with my clarinetist colleague in October.)

First, I do a quick flip through the score. I look for really big picture things like how many movements it has, the general tempo markings, whether each movement tends to look more lyrical or more technical, and so forth. This gives me an idea of the overall road map and usually alerts me to sections that will require more work than others. (Sometimes I’m wrong but I have to start somewhere.)

I focus on rhythm first. In my mind, I have a much stronger grasp on the piece if I have the rhythm scaffolding established, and then I can go back and fill in pitches. If I focus on pitches instead, it takes me much longer to get a piece worked up. It is true that I can’t always separate the pitches out but my main focus is the rhythm. To learn the rhythm, I count, tap it out, sing a syllable, conduct while counting or singing, or a combination of these. I usually am not playing my flute at this point. I go ahead and mark the spots where I am not able to immediately count it accurately. (If there’s one thing I’ve learned, it’s to avoid practicing mistakes.) I’ll focus in on those spots, incorporate them back into the larger context, and continue my rhythm work. I look for the patterns, which saves a lot of mental energy; I can just apply those already-learned rhythms when they reappear. I continue this analysis until I feel like the scaffolding of the piece is there.

Then, while still not playing flute, I take a look at the dynamic shaping, the phrases, the range, and whether those things coordinate or work against each other in some way. Often, when I’m a little further in the learning process, I will create a dynamic chart, where I map out the dynamics alone to see the big picture. This is especially helpful when working on the pacing of a piece.

After all of that is done, I pick up a flute and start playing pitches. I was never strong in ear training class, so I can’t always hear pitches in my head with complete accuracy; doing so isn’t efficient for me, so I use the flute to create those pitches. If I’ve gotten the rhythm relatively stable, the only things that might trip me up as I play through are awkward fingerings. If that’s the case, I work on those in tiny groupings until the unevenness is worked out. (I’m sure I have a blog post about that somewhere...) However, I am generally free to work on just pitches because I’ve established the rhythm already.

If I tried to work on everything all at once and move measure by measure, I would make very little progress. For me, dividing out the musical elements allows me to work efficiently and learn more music in less time.


Life-Changing Lessons

tweet

A few days ago, I had a lesson with one of my teachers, Christina Smith. I half jokingly mentioned on Twitter later that afternoon that it had “changed my life.” But after some reflection, maybe it did in a small way…

Since I am no longer in school, I have to grab lessons whenever my schedule allows and when I can be where the teacher is. What a drastic contrast to the days of luxury when I had a lesson every single week! I loved school, which is one reason why I’m a prof now; I loved the academic music classes except sight singing, at which I am truly abysmal; Oliver Sacks could explain a few things about my sight singing abilities, but I digress. But my weekly lesson, regardless of what day it was scheduled, was the beginning and ending of each week for me.

This means that when I have the opportunity for a lesson now, I soak up as much of it as possible. I don’t come to lessons waiting to having things explained to me. I know where I am as a musician and I try to come prepared to ask the questions that will draw out information that will help me develop. What a huge difference from my student days!

In my recent lesson, we worked on sound. My sound is generally pretty solid but it can always be improved. My teacher shared with me new thoughts about sound production. It was really interesting to see how *her* ideas about sound have changed since I first studied with her almost 15 years ago. I have completely integrated the ideas I learned from her then; as her ideas change (and result in improved sounds), my approach must also change.

I have plenty to work on now; it’s good to know that there is always room for improvement as a student and as a teacher. I can now share those same ideas with my students and feel free to change my approach as I encounter ideas that work better. And hopefully I can impress upon my students that regular lessons are a luxury, coming to lessons with an open mind and plenty of questions results in better progress, and the study of the flute is a lifelong process that never really ends.

Circular Breathing Progress

A couple of years ago, I made an attempt to learn circular breathing. It was a frustrating process and I didn’t stick with it, so I didn’t become proficient at the technique. It was probably a decent introduction to the idea but I’m not sure how much benefit I got from that initial failed attempt.

As I focus more heavily on contemporary music, the likelihood that I will encounter the specific requirement to use circular breathing within a piece becomes more realistic. I recently started working on a piece that does require circular breathing. Obviously it’s time for me to figure this out.

I have Robert Dick’s Circular Breathing for the Flutist. I also ran across a helpful video by Helen Bledsoe, which can be found here: http://www.youtube.com/watch?v=UQyAotWQjZQ. Reading descriptions of how to learn the technique is helpful, but sometimes it is necessary for me to see it being used to really understand what should be taking place.

At this point, I am able to inhale and exhale simultaneously for short bursts. I’m practicing this using a glass of water and a straw as well as just inhaling and exhaling without using the glass. When using the glass of water, you blow bubbles into the water through the straw while taking in a breath through your nose. Apparently it is rather common for people to accidentally inhale water while trying to coordinate these. Fortunately, I haven’t done that yet.

I haven’t been able to move past this stage at this point but I have been practicing it for only a week or so. I feel good about the consistency of my practice, even though I’ve been going a bit beyond the recommended 10 – 15 minutes a day. It takes me a while to get the hang of it each practice session, and once I do, I try to get as much as possible out of it. This has resulted in sore embouchure muscles after a couple of sessions, so I’m trying not to overdo it.

I hope to be able to start using this technique in an actual piece of music in a couple of months, while still keeping in mind that it can take years to be truly proficient.

I plan to keep track of my progress here, which will hopefully keep me accountable. If you are also in the process of learning how to use circular breathing, feel free to share your experiences.

Organizing Recital Preparations

Trying to prepare for a recital can be an overwhelming process. Whether you are a student planning a junior or senior recital or a professional who is trying to balance recital preparation with other duties, careful planning will ensure that the event goes smoothly.

First, it’s important to choose your program carefully. I usually have a backlog of music I would like to perform. I try to come up with a program that is balanced and includes a lot of variety. Even though I primarily focus on new music lately, I am aware of my audience and also include some of the older standard works. I also try not to neglect works written for interesting instrumental combinations when the players are available. For the recital I most recently presented, I included J.S. Bach, a French work, and a lot of new music. Of the new works, there is still considerable variety. One is for solo flute, two include digital audio sounds, one is for flute and clarinet, and another is for alto flute.

Some music has been on my stand for many months because I knew I would plan to program it on my next recital. Some of it is newly chosen, and I haven’t been working on it as long. As my recital approaches, I begin to keep a list of the entire program and put each work into one of these categories: almost performance ready but just needs polishing, really needs technical work, and ready to go. Then I determine a practice schedule based on that list. I continue to work on the pieces that are nearly ready but I spend much less time on them. The other works get more focused, intense practice like I describe here.

Lately, I have preferred to have most of my music learned and some kind of idea of how I want it to sound before I start collaborating with chamber music partners. While I keep an open mind, it seems to result in a stronger performance if we aren’t trying to make every musical decision as we go.

For students, I help them come up with a similar schedule to that outlined above, but we are more specific as to when and how often the student should practice each work and even each section of each work. Based on where they are with the music, we might come up with a schedule that includes the best-prepared works being heard in lessons every 2 or 3 weeks. The works that are nearly ready but need polishing might be heard every week but only those specific spots. The music that requires the most technical work will definitely get the most focus, including more intense lesson time. And as we approach the recital date, students will begin to play entire works in lessons, so they get the feel of what it’s like to play the entire program at one time. By making a specific schedule, this helps the student feel like there is a manageable plan between preparation and performance.

Teaching musical style can be tricky and obviously is a much longer process. I try to expose the student to various styles through demonstration and quality recordings; this is ongoing work, regardless of whether or not there is a recital on the horizon. Then when the student approaches a piece, we will have spent a little time with that particular style and it won’t be a brand new concept.

As with most things, careful preparation is important. Instead of forging ahead with no clear plan, a detailed approach will more likely result in a successful, confident performance.

Flute Lesson Grades!

As a college professor, one thing that can be difficult for me to assess at the end of the semester is how much progress my students have made in the preceding 14-or-so weeks. When grades are tied to assessing this progress, it makes things even dicier. Feelings, scholarships, and progress towards their degree completion makes the stakes high. After seven years of college teaching, some things have worked and some haven’t. Here are some ways I organize my assessment of my students’ progress, which can also be used by students for some self-reflection.

At the beginning of each semester, during the first lesson, I determine where that student is as far as tone, technique, and musicianship are concerned. Obviously this task is easier if I have taught the student before. It can be a little tricky if the student is brand new, but there is always room to make adjustments later. At that point, we decide together on various materials that will be used during the course of the semester. It depends on the student; if this is a young or inexperienced student, sometimes I will primarily use one method book. If it’s an older student, we tend to include etudes, technical exercises, repertoire, and other materials from a variety of sources. While I think there are certain materials that every student should eventually work through, I don’t feel like every student must be playing from the same sources at the same time. (This also makes lessons more interesting and varied during the week!) We come up with an approximate amount of material that can be covered; for example, we might outline one etude a week, three heavy technical exercises, tone studies, and two works to focus on for the entire semester. We talk about a reasonable amount to cover each week and try to identify performance dates for the pieces. This way we have benchmarks to hit at various points throughout the semester and can pace ourselves accordingly. I make sure to get students’ input here, as well. Maybe their vibrato doesn’t strike me as something that needs to be heavily addressed during the semester, but the student is quite uncomfortable with it. I will make sure that we cover that. Perhaps they know a piece that they would really like to work on. As long as it is appropriate for their level and is well-balanced with their other repertoire, I’m happy to allow them to make those decisions.

I also do a mid-semester “check up” to see if we’re making sufficient progress towards our outlined goals. If we’ve decided to finish one etude a week, and it’s taking three weeks to get through one etude on average, it’s time to reassess. Are the etudes really that difficult, or is the practice time spent on these insufficient or badly organized? This can be tricky to determine. Sometimes there are circumstances that we aren’t aware of as teachers, and it takes a good amount of trust to know whether a student is being lazy, has a mismanaged life, or is really having trouble with the material.

There is also the circumstance where something that wasn’t apparent in the first lesson reveals itself as an issue that must be dealt with immediately. Perhaps there are serious embouchure problems or major rhythmic inaccuracies in a student’s playing. Things so fundamental must be addressed before making progress towards other musical goals. In this case, a student might not get through all the material that was outlined in the first lesson, but if serious progress was made on these other aspects, it has been a successful semester.

If a student is making good progress towards the outlined goals, everything is in good shape. It’s still worthwhile to have that mid-semester reminder that there is still work to be done and grades do inevitably happen at the end of the semester. And of course, if a student is making progress beyond what was initially outlined, they will hear no complaints from me!

By making expectations completely clear at the beginning of the semester (and giving a reminder midway through), this lessens the possibilities of misunderstandings or hurt feelings when grades are due. Also, by making the student involved with the decision-making, that student has more ownership of the situation and hopefully feels more in control of his or her musical development.

Recital Preparation


Preparing for a recital can be a daunting process. If you’ve ever given a recital before, you’ve discovered that there’s more to the process than just learning the music. You often collaborate with a pianist or other chamber music partners. You perform in a space that might differ significantly from your usual practice room, acoustically speaking. You perform in formal attire as opposed to your usual clothes. And let’s not underestimate the effect that nerves and adrenaline have on a performance. So what do you do? Here are some ideas.

–          Technical work. As you get closer to the date and the music starts coming together, there might still be some technical spots that continue to give you trouble. As reassuring as it is to keep practicing the music that you *can* play, it’s a smarter idea to focus most of your available practice time on working out the tricky spots.

–          Recordings. Listening to recordings is incredibly helpful. They can quickly clarify questions that you might have about interpretation or ensemble. On the other hand, they might also be a good indication of what you *don’t* want to do. Either way, listening to a variety of recordings is a valuable investment of time when preparing for a recital.

–          The importance of rehearsals can’t be overstated. No matter how easy the coordination between the different parts of a work may seem, there are always those quirky mistakes that can spring up unexpectedly. If you’ve spent a reasonable amount of time in rehearsal, you should be able to minimize those unfortunate mistakes. Write in cues for music in the other parts that you seem to always notice. Even if the performance is going perfectly well, those aural reassurances might be just what you need to set your mind at ease.

–          Try to practice in the recital hall as much as possible. In larger venues, this isn’t always possible since they tend to be booked up all the time. You can still talk to people who have played in the space before. Is it a live space? Muffled? Hard to hear your chamber music partners? Do there always seem to be balance problems? Get as much information as possible before your dress rehearsal and performance.

–          Do some practice run-throughs in your formal clothing. For guys, this probably isn’t such a huge change, but for ladies, this can be a major adjustment. Think about the temperature in the hall. Do you want to wear something sleeveless, or will you be shivering? If you’re wearing a dress, make sure it isn’t too long; you don’t want to trip over the hem on your way across the stage. And don’t forget to think about your shoes! If you tend to stick to flats most of the time, this might not be the time to try out those 4-inch stilettos, no matter how good they look. It’s a good idea to practice in the shoes you intend to wear for the performance itself.

–          I’m a big believer in practicing in small sections. As far as learning technical material, it’s really the most efficient way, even though it requires more focused practice. However, the experience of giving a performance is completely different from working in these small chunks. As your recital date approaches, it’s a really good idea to start playing through your entire program. A couple of weeks before is usually a good time to try this because your technique should be solid and you should be quite familiar with the music. If you can’t make it all the way through, that’s ok. You still have a couple of weeks to build up endurance. Keep trying to make run-throughs of your recital program and try to get a little further in it each time.

–          Basically, preparation is the key to a successful performance. Trying to visualize all aspects of the performance from the actual music to the performance space to your clothing will help you pull off a polished, solid recital.

Practice Tips

The following was a result of a handout I put together for a workshop. More detailed information can be found about these topics in separate blog posts on this site.


Establish a solid practice schedule: 

  • Actually block off time in your schedule designated specifically for practicing. Avoid using it for lunch, socializing, homework, errands, sleeping, and so forth. As a musician, practicing is part of your job, so treat it with professionalism. 
  • Write your designated practice time in your schedule. Enter it into your online planner. Make sure it ends up wherever you will see it until it becomes habit. 
  • Arrange your practice time for when you practice best. Some people love getting work done first thing in the morning before anyone else is around to be a distraction. Others work best late at night. Maybe right before or after lunch is when you’re most alert. Figure out when your most effective practice time is and make sure you schedule around that. A reasonable amount of focused practice is better than lots of unfocused practice. 
  • Your practice time doesn’t have to be one large block. Maybe you have 30 free minutes between classes early in the morning. That’s perfect for your warm-up! You can then schedule another practice session for technical work and repertoire, or you can split that work into two sessions. 

When approaching a new piece: 

  • Listen to a quality recording of the piece. Yes, this counts as practicing!
  • Do a quick run-through of the piece to get a feel for it and where the difficult parts are.
  • Actually write the tempos of each problem area in your music (in pencil) so you remember where you are the next time you practice. You will probably have different tempos for each difficult section of the work, but that’s ok. You’ll eventually work them all up to the same tempo. Don’t forget to update the tempo in your music after you’ve made progress.
  • In particularly difficult sections, it may be necessary to break your practice down into just 2 or 3 notes. This may seem too simple, but it’s a much more effective use of your practice time than simply running through the music and making little, if any, progress.
  • Save run-throughs. Start doing more of these as you approach a performance to get a feel for the work in its entirety and to start building endurance. It’s also helpful to do occasionally to assess how well your practice is going, but it’s simply not enough to be your sole practice strategy.

Handling especially difficult sections:

  • First, make sure you’re practicing slowly and with a metronome. Play it as slowly as needed so that you’re able to play the entire passage correctly. This may be half-speed or even slower. That’s ok; you’ll speed it up later.
  • Second, try playing the passage with different articulations. Try slurring the difficult passage, articulating it, slurring small and large groupings, and combining articulations and slurs.
  • Third, alter the rhythm of the passage. If the passage is made up of eighth notes, play a dotted eighth/sixteenth note pattern. Then reverse it and play a sixteenth note/dotted eighth note pattern.
  • Finally, try playing the passage backwards. This gives your brain and fingers a serious workout. Practice this section backwards until you can play it smoothly and comfortably.
  • Once you’ve practiced this difficult section with all of these changes, play it as written. Even after a short amount of practice, you should see considerable improvement.

How do you know when you’re improving?

  • Checking metronome markings. This is a pretty simple way to measure progress, especially in technical passages. Being able to play something a few clicks faster than you could at the beginning of your practice session is a pretty good indication of progress.
  • Being able to play longer passages in a work. Maybe you could play only small portions of a work previously. Maybe you could only make it through one movement before you felt fatigued or lost focus. Suddenly, you can make it through the entire piece successfully. This is a positive sign, especially if you are getting close to a recital date.
  • Noticing an improvement in tone quality. This issue becomes more subjective. Recording yourself, an eye-opening experience, is a great way to hear what your audience is hearing. The sound from the performer’s side of the instrument can be vastly different from what the sound is by the time it reaches the audience. Maybe you’ve been working on tone and you *think* it’s clearer, more resonant, more focused, and so on. Double-check it with your recording device.

Technique stuff

If  you are interested in following along with Sir James Galway as he overhauls his technique, check out the following video. He has issued a “Practice Challenge,” where flutists from presumably around the world will all be working out of the same technique book. He will be using Marcel Moyse’s Daily Exercises book. I will be following along with the challenge loosely. I usually work out of this Moyse book every day, so I am going to be adapting the challenge by fiddling around with the articulations.

http://galwaynetwork.com/scale.htm

I’m also feeling rather sheepish about my short-lived experimentations with circular breathing. I started work on it a little over a year ago but didn’t commit to it like I should have. Now I’m kicking myself; if I had stuck with it, I would have probably been fairly fluent in the technique by this point. I’ve dug out my book and am considering adding it to my practice regimen. Anyone out there have any experience with circular breathing?

Practicing Difficult Sections

What do you do when you’ve practiced that one difficult section over and over and over again, and it still isn’t right? It’s not fast enough, or smooth enough, or loud enough, or …

It can be really frustrating when you’re making an honest effort to improve but you aren’t seeing results.

Next time you find yourself stuck in this situation, try the following tips. You’re still practicing the same musical material, but you’re making your brain (and fingers) think about it in a different way.

First – make sure you’re practicing slowly with a metronome. Play it as slowly as needed so that you’re able to play the entire passage correctly. This may be half-speed or even slower. That’s ok; you’ll speed it up later.

Second – Try playing the passage with different articulations. Take a look at this measure taken from Robert Muczynski’s Sonata for Flute and Piano:


Instead of playing it as written, try articulating each note:

Then try slurring pairs of notes:


Then try slurring larger groups:

Finally, play it again as written.
Third – Alter the rhythm of the passage. Instead of straight eighth notes, play a dotted eighth-sixteenth note pattern:

Then try a sixteenth note-dotted eighth note pattern:

Finally – Try playing the passage backwards. This gives your brain and fingers a serious workout. Work on this section backwards until you can play it smoothly and comfortably.


Once you’ve practiced this section with all of these changes, play it as written. Even after a short amount of practice, you should see a considerable improvement.

Have you tried any of these tips? Let me know how they work!

Perspective

Often, when you have been doing a considerable amount of practice, you suddenly feel like you’re getting much WORSE instead of better.

In my experience, this is actually a good thing. You aren’t getting worse. It’s just that your ears are now more acutely aware of the things about your playing that could be improved. You’re developing a more critical perspective.

Keep plowing through. You’ll get over the hurdle. Sometimes a little self-awareness is uncomfortable, but it means that you’re improving.

Facebook
YouTube
Instagram
Tiktok