Flute Fingering Chart

Do you need a flute fingering chart? I tend to get a lot of questions about how to play certain notes, or where to find a reliable source of finding how to play certain notes. A fingering chart lists every (well, for the most part) note that we can play on the flute, and it tells you which keys to press down and which keys to leave open to create the particular note you’re trying to play.

Here are some options when you’re learning flute:
1. If you’re currently playing out of a flute method book, there should be a flute fingering chart included in the front or the back of the book. Lately, I have preferred using the Flute 101 series.

2. If you would like a smaller, more portable flute fingering chart, they make laminated ones like this one. If you use a flute carrying case (other than the hard plastic or wood case your flute fits in), it can usually be tucked into there, or it will fit into your band folder, flute bag, or bookbag. Don’t force it into your flute case! Anything other than the actual flute can bend or break fragile flute parts!

3. If you want a website, I always recommend The Woodwind Fingering Guide to my students. It lists the most common notes we play, as well as the extreme upper register. It covers all the woodwind instruments, so be sure to share it with your friends!

4. If you prefer a visual demonstration, check out videos on my TikTok or YouTube. I have a bunch of videos made for many of the flute notes we play; if it isn’t up there, send me an email and I’ll get it made for you!

If you have another fingering chart you happen to love, please let me know! I’m always adding to my teaching material arsenal and would love to see your favorites.

If you’re looking for flute lessons, I’d love to work with you! I teach online and you can book a time slot with me here!


*Some of the links contained in this post may be affiliate links. This means — at no cost to you — I may earn a commission if you make a purchase. That helps to support this site. Thanks!

Reading a New Piece

Where to start when taking a look at a piece for the first time? Obviously there are as many approaches as there are musicians, and different pieces call for different attention. For an example, let’s take a look at the Duos for Flute and Clarinet by Robert Muczynski. (I’ll be performing this with my clarinetist colleague in October.)

First, I do a quick flip through the score. I look for really big picture things like how many movements it has, the general tempo markings, whether each movement tends to look more lyrical or more technical, and so forth. This gives me an idea of the overall road map and usually alerts me to sections that will require more work than others. (Sometimes I’m wrong but I have to start somewhere.)

I focus on rhythm first. In my mind, I have a much stronger grasp on the piece if I have the rhythm scaffolding established, and then I can go back and fill in pitches. If I focus on pitches instead, it takes me much longer to get a piece worked up. It is true that I can’t always separate the pitches out but my main focus is the rhythm. To learn the rhythm, I count, tap it out, sing a syllable, conduct while counting or singing, or a combination of these. I usually am not playing my flute at this point. I go ahead and mark the spots where I am not able to immediately count it accurately. (If there’s one thing I’ve learned, it’s to avoid practicing mistakes.) I’ll focus in on those spots, incorporate them back into the larger context, and continue my rhythm work. I look for the patterns, which saves a lot of mental energy; I can just apply those already-learned rhythms when they reappear. I continue this analysis until I feel like the scaffolding of the piece is there.

Then, while still not playing flute, I take a look at the dynamic shaping, the phrases, the range, and whether those things coordinate or work against each other in some way. Often, when I’m a little further in the learning process, I will create a dynamic chart, where I map out the dynamics alone to see the big picture. This is especially helpful when working on the pacing of a piece.

After all of that is done, I pick up a flute and start playing pitches. I was never strong in ear training class, so I can’t always hear pitches in my head with complete accuracy; doing so isn’t efficient for me, so I use the flute to create those pitches. If I’ve gotten the rhythm relatively stable, the only things that might trip me up as I play through are awkward fingerings. If that’s the case, I work on those in tiny groupings until the unevenness is worked out. (I’m sure I have a blog post about that somewhere...) However, I am generally free to work on just pitches because I’ve established the rhythm already.

If I tried to work on everything all at once and move measure by measure, I would make very little progress. For me, dividing out the musical elements allows me to work efficiently and learn more music in less time.


Rhythmic Studies

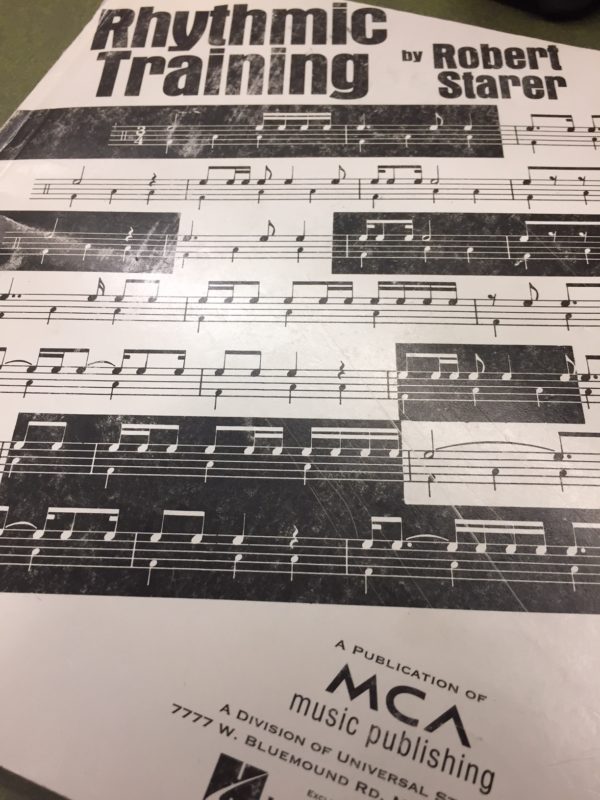
As an undergrad, we used Rhythmic Training by Robert Starer in our theory classes. Honestly, I’m a little fuzzy on which theory classes used it (edited to add: after consulting the label on the back of my book, it was used in MUSI 1111, which corresponds to Aural Skills I at Kennesaw State University). I kept almost all my textbooks (with the exception of my least-favorite sight singing book!), and as I moved further along in my applied teaching, reached for this one when I had students who could benefit from some isolated rhythm practice.

The book begins with what students frequently think are insultingly-easy exercises: counting quarter, half, dotted-half, and whole notes. The layout is such that the steady pulse is printed at the bottom of the staff, and the rhythm under consideration is printed at the top of the staff. There are a few pages of “Preliminary Exercises” (the “easy” ones), and then it moves into twelve chapters. I caution students about taking these exercises for granted based on the beginning material because they increase in difficulty at a swift pace. After treating both common and lesser-seen time signatures, there is a section in Chapter 1 on changing meters. Chapter 2 introduces subdivision in a variety of time signatures. Chapters 3 and 4 introduce more complex subdivisions. By the time we reach Chapter 5, the exercises mix the types of subdivisions (eighth notes, triplets, sixteenths, etc.). Increasingly small subdivisions is the subject through Chapter 9. Chapter 10 changes the rate of pulse; Chapter 11 is a review, and Chapter 12 pits two rhythms against each other.

Often I will use this book with students with limited experience with applied lessons. Sometimes students are very comfortable playing in a large ensemble where there is a conductor and relatively steady pace. When this pulse has to come from the student himself, problems can present themselves.

Practically, I will usually include one or two pages per week. The student is free to work through these however he or she would like, but we always “perform” them the same way in lessons. If they feel comfortable with the material, I turn on a metronome click and off they go, playing the rhythm printed at the top of the staff. If they aren’t comfortable with the material, I have them talk through, analyze, and clap the rhythm in question. We continue to work on smaller and smaller sections to zoom in on the trouble spots. Once we practice it (much in the same way we would practice an excerpt from their etudes or repertoire), they play through it on the flute.

In my experience, working through these exercises results in significant improvement. Even working through approximately half of the book sets student flutists up for success in most rhythms they will encounter in the standard repertoire. Lesson time is at a premium (especially when underclassmen have a 30-minute lesson each week) but this book is worth fitting in. The fundamental skills gleaned from it pay off dividends when learning the vast majority of our repertoire.

New Flute!

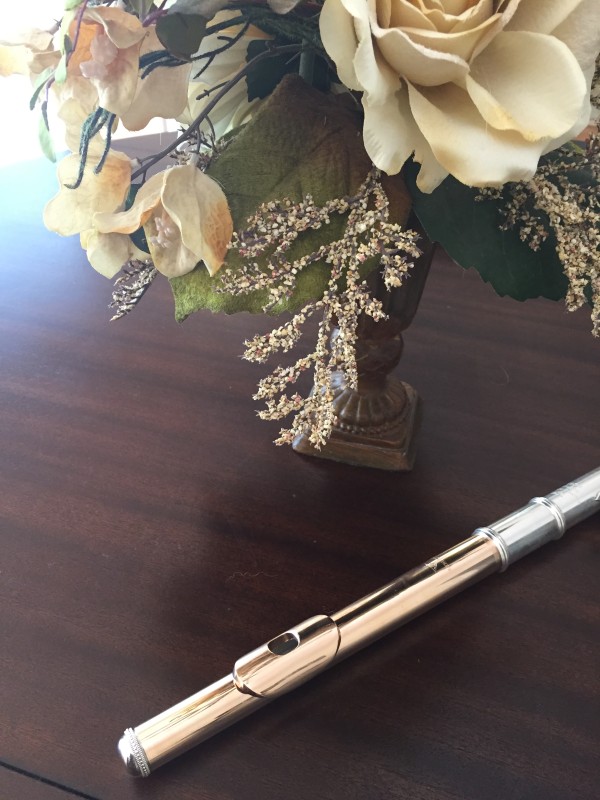
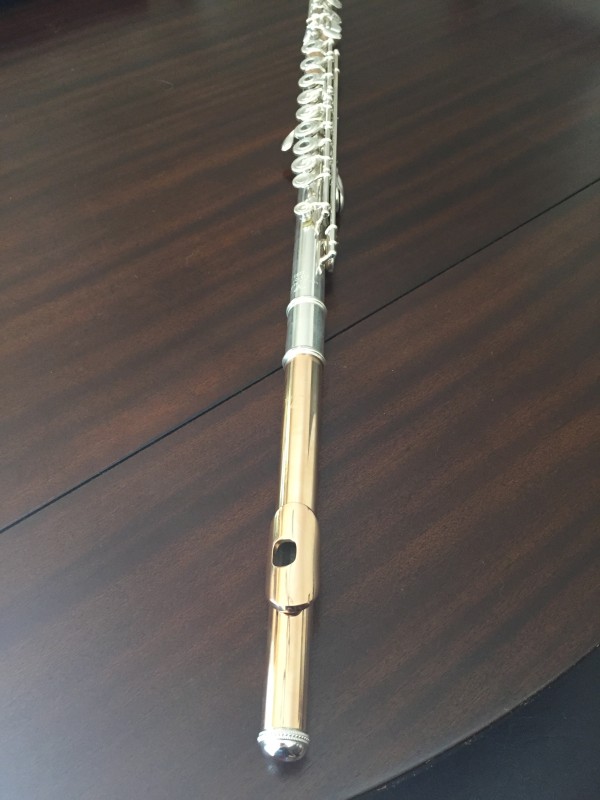
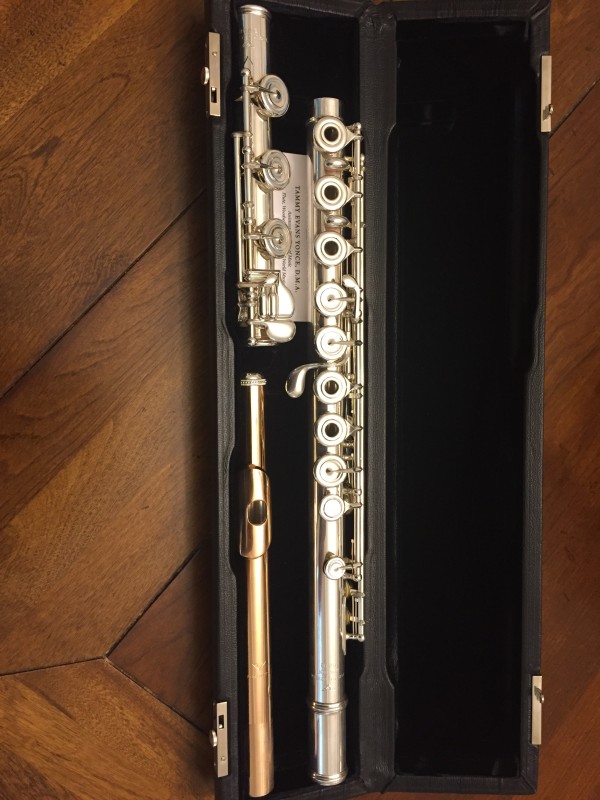
The flute trials are over. Recently, I bit the bullet and bought a silver handmade Powell flute, and I paired it with a Ruby Aurumite soloist cut headjoint.

Once I decided that I wanted a silver inline handmade Powell, I spent a lot of time trying out different headjoints. I found this to be a time-consuming process because there were aspects of each headjoint that I liked, so I had to be patient until I could get my hands on one that had each of those desirable qualities in the same headjoint. The soloist cut works best for me. Eventually, I narrowed my choices down to a silver, a 9k Aurumite, and the Ruby Aurumite. I played them in different rooms and on various repertoire over a period of time. I recorded myself playing each of them; besides listening to the recordings myself, I sent them to a friend for his opinion. The richness of the Ruby Aurumite sound was what finally won me over, and I decided on that one.

Shortly after making my decision, I performed at the Canadian Flute Convention, and I found that very little transition was necessary from my old flute to the new one. The scale seems to be slightly different, which will take some adjustment, but the mechanism is solid and the tone color potential with the headjoint is exciting.

IMG_0772

IMG_0773

IMG_0774


Time Off

IMG_0988[1]This month, I did something I haven’t done in recent memory.

I took a vacation.

Now, to be fair, I have gone on vacation in the past five years. But it always included work. I brought a computer and flute along, and felt obligated to keep up with email, practicing, reading, writing, and idea generating. While I enjoyed myself, there was always that pressure to work underscoring everything.

This time, I didn’t bring my laptop along. My flute was in the repair shop but I brought a backup. I brought one work-related book. And of course I had my phone, which kept me tied to colleague-friends.  But most of the projects I have been working on, including my ever-expanding etude project, came to a grinding halt. I spent nearly four weeks away from work, visiting family and friends, and spending the last week on the beach. Living in the middle of the country for the past couple of years has made me realize how much I miss the coast, and it is always a restorative place to visit. There the days run into each other, and the passing of time is marked by afternoon thundershowers, amazing sunsets, and the changing tides. It took a while for me to decompress, but I am more relaxed than I have been in a very long time.

I practiced just a bit but it was when I truly felt like it, and it was for short periods of time. I read just a couple of chapters of my work-related book. I came up with a bunch of new ideas, but they were spontaneously generated. I made a note of them and will work on them later. Instead of the usual type of productivity, I picked blueberries and made a bunch of blueberry syrup. I visited parents, grandparents, brothers, aunts, uncles, and in-laws. My husband and I spent an epic whirlwind couple of days with Al Theisen in Asheville, North Carolina; we also had a great time with friends, including Michael Kallstrom, in Kentucky. I visited old high school friends who still live in my hometown. I ate well, including home cookin’ as well as meals at restaurants such as Hugh Acheson’s 5&10, Mary Mac’s Tea Room in Atlanta, and Southern Soul BBQ in Saint Simons Island, GA. I spent time in Athens, GA and St. Louis. I drove through 10 different states. I bought a stack of new books from the excellent bookstore on Jekyll Island, GA. And I spent a glorious week at my favorite place: the Golden Isles of Georgia.

I made my semi-annual trip to the grocery store specifically to buy regional food that I can’t find in the upper midwest. Vidalia onions, honey, muscadine wine, White Lily flour, Cheerwine, Duke’s mayonnaise, pecan rice, cornmeal, and Southern Soul BBQ sauce now fill my pantry until my next trip home.

This post is a departure from the usual, but so was this month. And guess what? The world is still spinning, my career still seems to be intact, and I am refreshed and ready to jump back in. Maybe I’ll make this vacation-thing a regular occurrence.

New Piece

IMG_0769[1]I’m really looking forward to performing a brand new work for glissando flute and piano by John Griffin. We first met at the National Flute Association Convention in New Orleans in 2013, where I performed another work using the glissando headjoint. We got the details for a new work ironed out, tweaked it a bit when we saw each other at the regional College Music Society conference in Fargo in 2014, and now it’s ready to be practiced. It was great to work with John, and I’m looking forward to giving the premiere of this work during the fall of this year.

Circular Breathing Progress

A couple of years ago, I made an attempt to learn circular breathing. It was a frustrating process and I didn’t stick with it, so I didn’t become proficient at the technique. It was probably a decent introduction to the idea but I’m not sure how much benefit I got from that initial failed attempt.

As I focus more heavily on contemporary music, the likelihood that I will encounter the specific requirement to use circular breathing within a piece becomes more realistic. I recently started working on a piece that does require circular breathing. Obviously it’s time for me to figure this out.

I have Robert Dick’s Circular Breathing for the Flutist. I also ran across a helpful video by Helen Bledsoe, which can be found here: http://www.youtube.com/watch?v=UQyAotWQjZQ. Reading descriptions of how to learn the technique is helpful, but sometimes it is necessary for me to see it being used to really understand what should be taking place.

At this point, I am able to inhale and exhale simultaneously for short bursts. I’m practicing this using a glass of water and a straw as well as just inhaling and exhaling without using the glass. When using the glass of water, you blow bubbles into the water through the straw while taking in a breath through your nose. Apparently it is rather common for people to accidentally inhale water while trying to coordinate these. Fortunately, I haven’t done that yet.

I haven’t been able to move past this stage at this point but I have been practicing it for only a week or so. I feel good about the consistency of my practice, even though I’ve been going a bit beyond the recommended 10 – 15 minutes a day. It takes me a while to get the hang of it each practice session, and once I do, I try to get as much as possible out of it. This has resulted in sore embouchure muscles after a couple of sessions, so I’m trying not to overdo it.

I hope to be able to start using this technique in an actual piece of music in a couple of months, while still keeping in mind that it can take years to be truly proficient.

I plan to keep track of my progress here, which will hopefully keep me accountable. If you are also in the process of learning how to use circular breathing, feel free to share your experiences.

Flute Lesson Grades!

As a college professor, one thing that can be difficult for me to assess at the end of the semester is how much progress my students have made in the preceding 14-or-so weeks. When grades are tied to assessing this progress, it makes things even dicier. Feelings, scholarships, and progress towards their degree completion makes the stakes high. After seven years of college teaching, some things have worked and some haven’t. Here are some ways I organize my assessment of my students’ progress, which can also be used by students for some self-reflection.

At the beginning of each semester, during the first lesson, I determine where that student is as far as tone, technique, and musicianship are concerned. Obviously this task is easier if I have taught the student before. It can be a little tricky if the student is brand new, but there is always room to make adjustments later. At that point, we decide together on various materials that will be used during the course of the semester. It depends on the student; if this is a young or inexperienced student, sometimes I will primarily use one method book. If it’s an older student, we tend to include etudes, technical exercises, repertoire, and other materials from a variety of sources. While I think there are certain materials that every student should eventually work through, I don’t feel like every student must be playing from the same sources at the same time. (This also makes lessons more interesting and varied during the week!) We come up with an approximate amount of material that can be covered; for example, we might outline one etude a week, three heavy technical exercises, tone studies, and two works to focus on for the entire semester. We talk about a reasonable amount to cover each week and try to identify performance dates for the pieces. This way we have benchmarks to hit at various points throughout the semester and can pace ourselves accordingly. I make sure to get students’ input here, as well. Maybe their vibrato doesn’t strike me as something that needs to be heavily addressed during the semester, but the student is quite uncomfortable with it. I will make sure that we cover that. Perhaps they know a piece that they would really like to work on. As long as it is appropriate for their level and is well-balanced with their other repertoire, I’m happy to allow them to make those decisions.

I also do a mid-semester “check up” to see if we’re making sufficient progress towards our outlined goals. If we’ve decided to finish one etude a week, and it’s taking three weeks to get through one etude on average, it’s time to reassess. Are the etudes really that difficult, or is the practice time spent on these insufficient or badly organized? This can be tricky to determine. Sometimes there are circumstances that we aren’t aware of as teachers, and it takes a good amount of trust to know whether a student is being lazy, has a mismanaged life, or is really having trouble with the material.

There is also the circumstance where something that wasn’t apparent in the first lesson reveals itself as an issue that must be dealt with immediately. Perhaps there are serious embouchure problems or major rhythmic inaccuracies in a student’s playing. Things so fundamental must be addressed before making progress towards other musical goals. In this case, a student might not get through all the material that was outlined in the first lesson, but if serious progress was made on these other aspects, it has been a successful semester.

If a student is making good progress towards the outlined goals, everything is in good shape. It’s still worthwhile to have that mid-semester reminder that there is still work to be done and grades do inevitably happen at the end of the semester. And of course, if a student is making progress beyond what was initially outlined, they will hear no complaints from me!

By making expectations completely clear at the beginning of the semester (and giving a reminder midway through), this lessens the possibilities of misunderstandings or hurt feelings when grades are due. Also, by making the student involved with the decision-making, that student has more ownership of the situation and hopefully feels more in control of his or her musical development.


Practice Tips

The following was a result of a handout I put together for a workshop. More detailed information can be found about these topics in separate blog posts on this site.


Establish a solid practice schedule: 

  • Actually block off time in your schedule designated specifically for practicing. Avoid using it for lunch, socializing, homework, errands, sleeping, and so forth. As a musician, practicing is part of your job, so treat it with professionalism. 
  • Write your designated practice time in your schedule. Enter it into your online planner. Make sure it ends up wherever you will see it until it becomes habit. 
  • Arrange your practice time for when you practice best. Some people love getting work done first thing in the morning before anyone else is around to be a distraction. Others work best late at night. Maybe right before or after lunch is when you’re most alert. Figure out when your most effective practice time is and make sure you schedule around that. A reasonable amount of focused practice is better than lots of unfocused practice. 
  • Your practice time doesn’t have to be one large block. Maybe you have 30 free minutes between classes early in the morning. That’s perfect for your warm-up! You can then schedule another practice session for technical work and repertoire, or you can split that work into two sessions. 

When approaching a new piece: 

  • Listen to a quality recording of the piece. Yes, this counts as practicing!
  • Do a quick run-through of the piece to get a feel for it and where the difficult parts are.
  • Actually write the tempos of each problem area in your music (in pencil) so you remember where you are the next time you practice. You will probably have different tempos for each difficult section of the work, but that’s ok. You’ll eventually work them all up to the same tempo. Don’t forget to update the tempo in your music after you’ve made progress.
  • In particularly difficult sections, it may be necessary to break your practice down into just 2 or 3 notes. This may seem too simple, but it’s a much more effective use of your practice time than simply running through the music and making little, if any, progress.
  • Save run-throughs. Start doing more of these as you approach a performance to get a feel for the work in its entirety and to start building endurance. It’s also helpful to do occasionally to assess how well your practice is going, but it’s simply not enough to be your sole practice strategy.

Handling especially difficult sections:

  • First, make sure you’re practicing slowly and with a metronome. Play it as slowly as needed so that you’re able to play the entire passage correctly. This may be half-speed or even slower. That’s ok; you’ll speed it up later.
  • Second, try playing the passage with different articulations. Try slurring the difficult passage, articulating it, slurring small and large groupings, and combining articulations and slurs.
  • Third, alter the rhythm of the passage. If the passage is made up of eighth notes, play a dotted eighth/sixteenth note pattern. Then reverse it and play a sixteenth note/dotted eighth note pattern.
  • Finally, try playing the passage backwards. This gives your brain and fingers a serious workout. Practice this section backwards until you can play it smoothly and comfortably.
  • Once you’ve practiced this difficult section with all of these changes, play it as written. Even after a short amount of practice, you should see considerable improvement.

How do you know when you’re improving?

  • Checking metronome markings. This is a pretty simple way to measure progress, especially in technical passages. Being able to play something a few clicks faster than you could at the beginning of your practice session is a pretty good indication of progress.
  • Being able to play longer passages in a work. Maybe you could play only small portions of a work previously. Maybe you could only make it through one movement before you felt fatigued or lost focus. Suddenly, you can make it through the entire piece successfully. This is a positive sign, especially if you are getting close to a recital date.
  • Noticing an improvement in tone quality. This issue becomes more subjective. Recording yourself, an eye-opening experience, is a great way to hear what your audience is hearing. The sound from the performer’s side of the instrument can be vastly different from what the sound is by the time it reaches the audience. Maybe you’ve been working on tone and you *think* it’s clearer, more resonant, more focused, and so on. Double-check it with your recording device.

Technique stuff

If  you are interested in following along with Sir James Galway as he overhauls his technique, check out the following video. He has issued a “Practice Challenge,” where flutists from presumably around the world will all be working out of the same technique book. He will be using Marcel Moyse’s Daily Exercises book. I will be following along with the challenge loosely. I usually work out of this Moyse book every day, so I am going to be adapting the challenge by fiddling around with the articulations.

http://galwaynetwork.com/scale.htm

I’m also feeling rather sheepish about my short-lived experimentations with circular breathing. I started work on it a little over a year ago but didn’t commit to it like I should have. Now I’m kicking myself; if I had stuck with it, I would have probably been fairly fluent in the technique by this point. I’ve dug out my book and am considering adding it to my practice regimen. Anyone out there have any experience with circular breathing?

Facebook
YouTube
Instagram
Tiktok