Rhythmic Studies

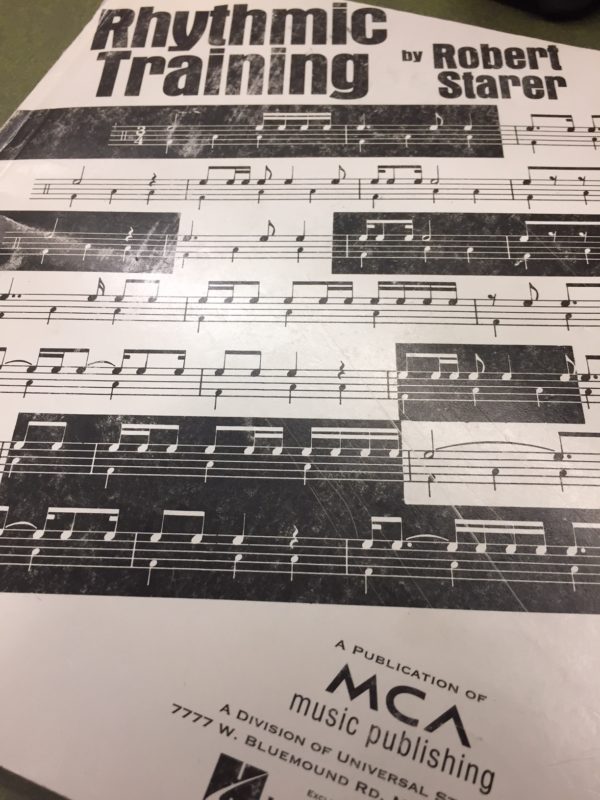
As an undergrad, we used Rhythmic Training by Robert Starer in our theory classes. Honestly, I’m a little fuzzy on which theory classes used it (edited to add: after consulting the label on the back of my book, it was used in MUSI 1111, which corresponds to Aural Skills I at Kennesaw State University). I kept almost all my textbooks (with the exception of my least-favorite sight singing book!), and as I moved further along in my applied teaching, reached for this one when I had students who could benefit from some isolated rhythm practice.

The book begins with what students frequently think are insultingly-easy exercises: counting quarter, half, dotted-half, and whole notes. The layout is such that the steady pulse is printed at the bottom of the staff, and the rhythm under consideration is printed at the top of the staff. There are a few pages of “Preliminary Exercises” (the “easy” ones), and then it moves into twelve chapters. I caution students about taking these exercises for granted based on the beginning material because they increase in difficulty at a swift pace. After treating both common and lesser-seen time signatures, there is a section in Chapter 1 on changing meters. Chapter 2 introduces subdivision in a variety of time signatures. Chapters 3 and 4 introduce more complex subdivisions. By the time we reach Chapter 5, the exercises mix the types of subdivisions (eighth notes, triplets, sixteenths, etc.). Increasingly small subdivisions is the subject through Chapter 9. Chapter 10 changes the rate of pulse; Chapter 11 is a review, and Chapter 12 pits two rhythms against each other.

Often I will use this book with students with limited experience with applied lessons. Sometimes students are very comfortable playing in a large ensemble where there is a conductor and relatively steady pace. When this pulse has to come from the student himself, problems can present themselves.

Practically, I will usually include one or two pages per week. The student is free to work through these however he or she would like, but we always “perform” them the same way in lessons. If they feel comfortable with the material, I turn on a metronome click and off they go, playing the rhythm printed at the top of the staff. If they aren’t comfortable with the material, I have them talk through, analyze, and clap the rhythm in question. We continue to work on smaller and smaller sections to zoom in on the trouble spots. Once we practice it (much in the same way we would practice an excerpt from their etudes or repertoire), they play through it on the flute.

In my experience, working through these exercises results in significant improvement. Even working through approximately half of the book sets student flutists up for success in most rhythms they will encounter in the standard repertoire. Lesson time is at a premium (especially when underclassmen have a 30-minute lesson each week) but this book is worth fitting in. The fundamental skills gleaned from it pay off dividends when learning the vast majority of our repertoire.

Practice Tips

The following was a result of a handout I put together for a workshop. More detailed information can be found about these topics in separate blog posts on this site.


Establish a solid practice schedule: 

  • Actually block off time in your schedule designated specifically for practicing. Avoid using it for lunch, socializing, homework, errands, sleeping, and so forth. As a musician, practicing is part of your job, so treat it with professionalism. 
  • Write your designated practice time in your schedule. Enter it into your online planner. Make sure it ends up wherever you will see it until it becomes habit. 
  • Arrange your practice time for when you practice best. Some people love getting work done first thing in the morning before anyone else is around to be a distraction. Others work best late at night. Maybe right before or after lunch is when you’re most alert. Figure out when your most effective practice time is and make sure you schedule around that. A reasonable amount of focused practice is better than lots of unfocused practice. 
  • Your practice time doesn’t have to be one large block. Maybe you have 30 free minutes between classes early in the morning. That’s perfect for your warm-up! You can then schedule another practice session for technical work and repertoire, or you can split that work into two sessions. 

When approaching a new piece: 

  • Listen to a quality recording of the piece. Yes, this counts as practicing!
  • Do a quick run-through of the piece to get a feel for it and where the difficult parts are.
  • Actually write the tempos of each problem area in your music (in pencil) so you remember where you are the next time you practice. You will probably have different tempos for each difficult section of the work, but that’s ok. You’ll eventually work them all up to the same tempo. Don’t forget to update the tempo in your music after you’ve made progress.
  • In particularly difficult sections, it may be necessary to break your practice down into just 2 or 3 notes. This may seem too simple, but it’s a much more effective use of your practice time than simply running through the music and making little, if any, progress.
  • Save run-throughs. Start doing more of these as you approach a performance to get a feel for the work in its entirety and to start building endurance. It’s also helpful to do occasionally to assess how well your practice is going, but it’s simply not enough to be your sole practice strategy.

Handling especially difficult sections:

  • First, make sure you’re practicing slowly and with a metronome. Play it as slowly as needed so that you’re able to play the entire passage correctly. This may be half-speed or even slower. That’s ok; you’ll speed it up later.
  • Second, try playing the passage with different articulations. Try slurring the difficult passage, articulating it, slurring small and large groupings, and combining articulations and slurs.
  • Third, alter the rhythm of the passage. If the passage is made up of eighth notes, play a dotted eighth/sixteenth note pattern. Then reverse it and play a sixteenth note/dotted eighth note pattern.
  • Finally, try playing the passage backwards. This gives your brain and fingers a serious workout. Practice this section backwards until you can play it smoothly and comfortably.
  • Once you’ve practiced this difficult section with all of these changes, play it as written. Even after a short amount of practice, you should see considerable improvement.

How do you know when you’re improving?

  • Checking metronome markings. This is a pretty simple way to measure progress, especially in technical passages. Being able to play something a few clicks faster than you could at the beginning of your practice session is a pretty good indication of progress.
  • Being able to play longer passages in a work. Maybe you could play only small portions of a work previously. Maybe you could only make it through one movement before you felt fatigued or lost focus. Suddenly, you can make it through the entire piece successfully. This is a positive sign, especially if you are getting close to a recital date.
  • Noticing an improvement in tone quality. This issue becomes more subjective. Recording yourself, an eye-opening experience, is a great way to hear what your audience is hearing. The sound from the performer’s side of the instrument can be vastly different from what the sound is by the time it reaches the audience. Maybe you’ve been working on tone and you *think* it’s clearer, more resonant, more focused, and so on. Double-check it with your recording device.

Practicing Difficult Sections

What do you do when you’ve practiced that one difficult section over and over and over again, and it still isn’t right? It’s not fast enough, or smooth enough, or loud enough, or …

It can be really frustrating when you’re making an honest effort to improve but you aren’t seeing results.

Next time you find yourself stuck in this situation, try the following tips. You’re still practicing the same musical material, but you’re making your brain (and fingers) think about it in a different way.

First – make sure you’re practicing slowly with a metronome. Play it as slowly as needed so that you’re able to play the entire passage correctly. This may be half-speed or even slower. That’s ok; you’ll speed it up later.

Second – Try playing the passage with different articulations. Take a look at this measure taken from Robert Muczynski’s Sonata for Flute and Piano:


Instead of playing it as written, try articulating each note:

Then try slurring pairs of notes:


Then try slurring larger groups:

Finally, play it again as written.
Third – Alter the rhythm of the passage. Instead of straight eighth notes, play a dotted eighth-sixteenth note pattern:

Then try a sixteenth note-dotted eighth note pattern:

Finally – Try playing the passage backwards. This gives your brain and fingers a serious workout. Work on this section backwards until you can play it smoothly and comfortably.


Once you’ve practiced this section with all of these changes, play it as written. Even after a short amount of practice, you should see a considerable improvement.

Have you tried any of these tips? Let me know how they work!

Practicing: run-throughs vs. small chunks

I was never taught how to practice, but I remember the point at which my practicing became much more efficient. And this is really what we want, right? To get the most out of the limited practice time we have? Often, I find that my students only tend to run through music during their practice time, and there are inevitably technical issues in their playing that remain, causing them to stumble time after time. Run-throughs just aren’t effective as more focused practice, which requires more concentration and self-discipline. But it’s worth the extra work; the payoff with more focused practice is huge.

Consider these ideas when approaching a new work:
– Listen to a quality recording of the piece. Yes, this counts as practicing!
– Do a quick run-through of the piece to get a feel for it and where the difficult areas are.
– Work on those difficult spots slowly and with a metronome. Choose a slow enough tempo that you can play it accurately and gradually increase the tempo as it becomes more comfortable.
– Actually write the tempo of each problem area in your music (in pencil) so you remember where you are the next time you practice. You will probably have different tempos for each difficult section of the work, but that’s ok. You’ll eventually work them all up to the same tempo. Don’t forget to update the tempo in your music after you’ve made progress.
– In particularly difficult sections, it may be necessary to break your practice down into just 2 or 3 notes. This may seem too simple, but it’s a much more effective use of your practice time than simply running through the music and making little, if any, progress.
– Save run-throughs. Start doing more of these as you approach a performance to get a feel for the work in its entirety and to start building endurance. It’s also helpful to do occasionally to assess how well your practicing is going, but it’s simply not effective enough to be your sole practice strategy.

Next blog post: Specific ideas on how to break down practice more efficiently!

Taffanel and Gaubert practice tips

My battered copy of 17 Daily Exercises. The cover is around here somewhere...

The book “17 Daily Exercises” (or 17 Grands Exercices Journaliers de Mécanisme) by Paul Taffanel and Philippe Gaubert is the flutist’s bible. Since its publication in 1923, it has become a standard method book for all flutists. Taffanel began writing this book, and it was finished by his student, Gaubert, after Taffanel’s death.

I start my students in this book at a young age with the expectation that they will use it for many years. Even if they initially move at a slow pace, they are still developing technique and will use the book throughout their musical careers.

Some practice tips:

– If you are just starting in this book, work at a very slow tempo and be sure to use a metronome.
– Establish a tempo where you are able to play through the exercise comfortably (and write that tempo down!), then work on increasing the tempo.
– If you run into any problem spots, stop! Work out those isolated areas until they’re as comfortable as the rest of the exercise.
– When the exercise is moving along fairly comfortably, start using the different articulations listed at the top of each exercise.
– Try to work through one of these exercises each week. If that’s too much for you, divide it in half and spend two weeks on each exercise.

Eventually, you will want to work your way through this entire book. However, I prefer that my students tackle exercises 1, 2, 4, and 12 before moving on to the others.

* A note about breathing: Make sure you are breathing in places that make sense. For example, in exercise 4, place a fermata on the first note of measure 5. This is halfway through this key. Then place a fermata on the first note of measure 9. This is the switch from C major to its relative minor. After pausing on these notes, take a breath, and then begin the next section, repeating the note that you held under the fermata.

With diligent practice, you should see nice results in just a few weeks.

Have T&G practice tips of your own to share? Comments welcome!

Practicing: measuring progress

After reading Dr. Noa Kageyama’s excellent article on how much musicians should practice (“How Many Hours a Day Should You Practice?, www.bulletproofmusician.com), the question occurred to me: besides measuring quantity when it comes to practicing, how do we measure the quality of our practice? Dr. Kageyama begins to address this in his article. He makes the distinction between mindless and deliberate practicing. Obviously, we want to aim for deliberate practicing.

But, practically speaking, what does that mean?

I don’t claim to have a perfect system at this point, but here are some initial thoughts:

– Breakthrough days: These are perfect practice days. You discover that you’ve nailed that really technically difficult passage. Your etudes are flawless. Your technical warm-up is a breeze. Your tone is beautiful. Sadly, these days are few and far between. It’s easy to measure your progress on these days because you’ve mastered music that previously was a challenge.

Otherwise, if the stars and planets haven’t aligned to create the conditions for a breakthrough day:

– Metronome markings: This is a pretty simple way to measure progress, especially in technical repertoire passages, etudes, or technical studies. Being able to play something a few clicks faster than you could at the beginning of your practice session is a pretty good indication of progress.

– Being able to play longer passages in a work: Maybe you could play only small portions of a work previously. Maybe you could only make it through one movement before you felt fatigued or lost focus. Suddenly, you can make it through the entire piece successfully. This is a positive sign, especially if you are getting close to a recital date.

– Improvement in tone quality: This issue becomes more subjective. Recording yourself, an eye-opening experience, is a great way to hear what your audience is hearing. The sound from the performer’s side of the instrument can be vastly different from what the sound is by the time it reaches the audience. Maybe you’ve been working on tone and you *think* it’s clearer, more resonant, more focused, and so on. Check it with your recording device.

There are so many other aspects of our playing that are difficult, if not impossible, to measure. Tone color, phrasing, and rubato come to mind. How do we measure progress here? Is it simply enough to put in the practice time and wait for the next breakthrough day?

Comments welcome!

Facebook
YouTube
Instagram
Tiktok