Flute Fingering Chart

Do you need a flute fingering chart? I tend to get a lot of questions about how to play certain notes, or where to find a reliable source of finding how to play certain notes. A fingering chart lists every (well, for the most part) note that we can play on the flute, and it tells you which keys to press down and which keys to leave open to create the particular note you’re trying to play.

Here are some options when you’re learning flute:
1. If you’re currently playing out of a flute method book, there should be a flute fingering chart included in the front or the back of the book. Lately, I have preferred using the Flute 101 series.

2. If you would like a smaller, more portable flute fingering chart, they make laminated ones like this one. If you use a flute carrying case (other than the hard plastic or wood case your flute fits in), it can usually be tucked into there, or it will fit into your band folder, flute bag, or bookbag. Don’t force it into your flute case! Anything other than the actual flute can bend or break fragile flute parts!

3. If you want a website, I always recommend The Woodwind Fingering Guide to my students. It lists the most common notes we play, as well as the extreme upper register. It covers all the woodwind instruments, so be sure to share it with your friends!

4. If you prefer a visual demonstration, check out videos on my TikTok or YouTube. I have a bunch of videos made for many of the flute notes we play; if it isn’t up there, send me an email and I’ll get it made for you!

If you have another fingering chart you happen to love, please let me know! I’m always adding to my teaching material arsenal and would love to see your favorites.

If you’re looking for flute lessons, I’d love to work with you! I teach online and you can book a time slot with me here!


*Some of the links contained in this post may be affiliate links. This means — at no cost to you — I may earn a commission if you make a purchase. That helps to support this site. Thanks!

Reading a New Piece

Where to start when taking a look at a piece for the first time? Obviously there are as many approaches as there are musicians, and different pieces call for different attention. For an example, let’s take a look at the Duos for Flute and Clarinet by Robert Muczynski. (I’ll be performing this with my clarinetist colleague in October.)

First, I do a quick flip through the score. I look for really big picture things like how many movements it has, the general tempo markings, whether each movement tends to look more lyrical or more technical, and so forth. This gives me an idea of the overall road map and usually alerts me to sections that will require more work than others. (Sometimes I’m wrong but I have to start somewhere.)

I focus on rhythm first. In my mind, I have a much stronger grasp on the piece if I have the rhythm scaffolding established, and then I can go back and fill in pitches. If I focus on pitches instead, it takes me much longer to get a piece worked up. It is true that I can’t always separate the pitches out but my main focus is the rhythm. To learn the rhythm, I count, tap it out, sing a syllable, conduct while counting or singing, or a combination of these. I usually am not playing my flute at this point. I go ahead and mark the spots where I am not able to immediately count it accurately. (If there’s one thing I’ve learned, it’s to avoid practicing mistakes.) I’ll focus in on those spots, incorporate them back into the larger context, and continue my rhythm work. I look for the patterns, which saves a lot of mental energy; I can just apply those already-learned rhythms when they reappear. I continue this analysis until I feel like the scaffolding of the piece is there.

Then, while still not playing flute, I take a look at the dynamic shaping, the phrases, the range, and whether those things coordinate or work against each other in some way. Often, when I’m a little further in the learning process, I will create a dynamic chart, where I map out the dynamics alone to see the big picture. This is especially helpful when working on the pacing of a piece.

After all of that is done, I pick up a flute and start playing pitches. I was never strong in ear training class, so I can’t always hear pitches in my head with complete accuracy; doing so isn’t efficient for me, so I use the flute to create those pitches. If I’ve gotten the rhythm relatively stable, the only things that might trip me up as I play through are awkward fingerings. If that’s the case, I work on those in tiny groupings until the unevenness is worked out. (I’m sure I have a blog post about that somewhere...) However, I am generally free to work on just pitches because I’ve established the rhythm already.

If I tried to work on everything all at once and move measure by measure, I would make very little progress. For me, dividing out the musical elements allows me to work efficiently and learn more music in less time.


Rhythmic Studies

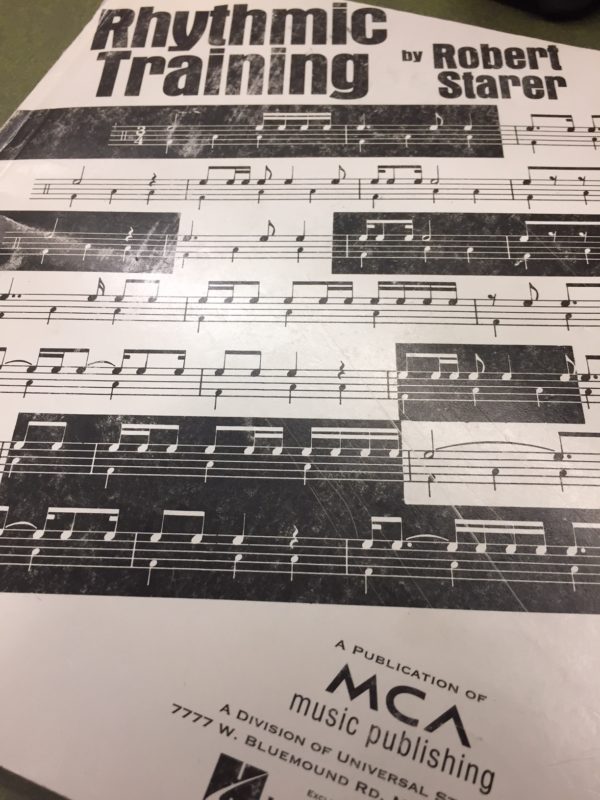
As an undergrad, we used Rhythmic Training by Robert Starer in our theory classes. Honestly, I’m a little fuzzy on which theory classes used it (edited to add: after consulting the label on the back of my book, it was used in MUSI 1111, which corresponds to Aural Skills I at Kennesaw State University). I kept almost all my textbooks (with the exception of my least-favorite sight singing book!), and as I moved further along in my applied teaching, reached for this one when I had students who could benefit from some isolated rhythm practice.

The book begins with what students frequently think are insultingly-easy exercises: counting quarter, half, dotted-half, and whole notes. The layout is such that the steady pulse is printed at the bottom of the staff, and the rhythm under consideration is printed at the top of the staff. There are a few pages of “Preliminary Exercises” (the “easy” ones), and then it moves into twelve chapters. I caution students about taking these exercises for granted based on the beginning material because they increase in difficulty at a swift pace. After treating both common and lesser-seen time signatures, there is a section in Chapter 1 on changing meters. Chapter 2 introduces subdivision in a variety of time signatures. Chapters 3 and 4 introduce more complex subdivisions. By the time we reach Chapter 5, the exercises mix the types of subdivisions (eighth notes, triplets, sixteenths, etc.). Increasingly small subdivisions is the subject through Chapter 9. Chapter 10 changes the rate of pulse; Chapter 11 is a review, and Chapter 12 pits two rhythms against each other.

Often I will use this book with students with limited experience with applied lessons. Sometimes students are very comfortable playing in a large ensemble where there is a conductor and relatively steady pace. When this pulse has to come from the student himself, problems can present themselves.

Practically, I will usually include one or two pages per week. The student is free to work through these however he or she would like, but we always “perform” them the same way in lessons. If they feel comfortable with the material, I turn on a metronome click and off they go, playing the rhythm printed at the top of the staff. If they aren’t comfortable with the material, I have them talk through, analyze, and clap the rhythm in question. We continue to work on smaller and smaller sections to zoom in on the trouble spots. Once we practice it (much in the same way we would practice an excerpt from their etudes or repertoire), they play through it on the flute.

In my experience, working through these exercises results in significant improvement. Even working through approximately half of the book sets student flutists up for success in most rhythms they will encounter in the standard repertoire. Lesson time is at a premium (especially when underclassmen have a 30-minute lesson each week) but this book is worth fitting in. The fundamental skills gleaned from it pay off dividends when learning the vast majority of our repertoire.

Applied Teaching in Woodwind Pedagogy

I teach woodwind pedagogy at South Dakota State University each fall, and it is always a juggling act. I like the text I use (Teaching Woodwinds, Mountain Peak Music) and I’m confident that my students will be able to employ it later as a helpful resource when they are in the trenches. However, it is difficult to juggle the presentation of brand new material about five different instruments and provide them with enough playing in-class playing time during the semester in a class that meets for only 50 minutes twice a week. Some of the material in the text is obviously best left for when the students actually need it (such as repertoire guides and the like) but some needs to be addressed in class. And while the performance bar is “fifth grade proficiency,” I think providing them with a beginning band in-class performance experience is valuable for many reasons. I also think it’s important for them to have the opportunity to do some teaching during the course of the class. I tweak the syllabus every year but I generally include the following components: going over the most basic, essential information on each of the five woodwinds; playing in a simulated band class frequently; and having them give mini lessons to classmates on one woodwind instrument they’ve had some experience with. This last component is what I’ll focus on for the rest of this post.

Each student is required to give one mini-lesson during the course of the semester. There are a lot of factors that go into the timing of these lessons; some students have had previous woodwind experience and others have not. To even the playing field (and to get the pace of the course well-established), I don’t schedule these until after the students have been tested on their first woodwind. This is approximately one-third of the way through the semester, and I can assume that every student in the class has some basic skills on at least one woodwind instrument at that point. I usually stagger these throughout the remainder of the semester so entire class periods aren’t full of nothing but lessons.

During the lesson, the teaching student is required to cover material that would be appropriate for a “first lesson.” In South Dakota, it is common for band directors to also give a one-on-one lesson to each student during the week. Therefore, these are skills that really will be likely components in their jobs. In my class, the teaching student will explain how to sit properly, open the case, and assemble the instrument. Depending on how quickly they are able to proceed, the student might try getting a sound out of the instrument (or perhaps just the head joint, mouthpiece, or reed). The teaching student demonstrates disassembly and proper placement of the parts in the case. Cleaning the instrument is also addressed. As these lessons take place, there are often snags – the student might have difficulty lining up the parts appropriately during assembly or might have trouble getting a sound. The teaching student is then tested and must use troubleshooting skills to work through the challenge. Most of the time, it goes well; even if it doesn’t, it’s a great simulation of the kind of situation they will be in once they are in a teaching job.

These lessons are conducted in a masterclass format. The rest of the class watches and is generally very supportive. They are tasked with taking notes, indicating portions of the lesson they thought worked well and opportunities for the teaching student to improve. Some of this feedback is discussed directly after the lesson, and I compile all comments and send them to the teaching student afterwards.

In addition to helping the teaching student get a little bit of real-world experience, these lessons serve another purpose. They really help to reinforce (for everyone) basic fundamentals. Ideas of healthy posture, proper hand placement, accurate instrument assembly, cleaning procedures, and many other “givens” are reinforced over and over throughout the semester. While it isn’t explicitly stated during each lesson, the repetition serves to make these ideas second nature, so when the student teacher becomes Teacher, they will hopefully impart the ideas to their students automatically. (It will also help their own playing, if they have developed any inefficient habits in these areas!) I also use in-class playing time to reinforce musical fundamentals, but that is a subject for another post…

New Flute!

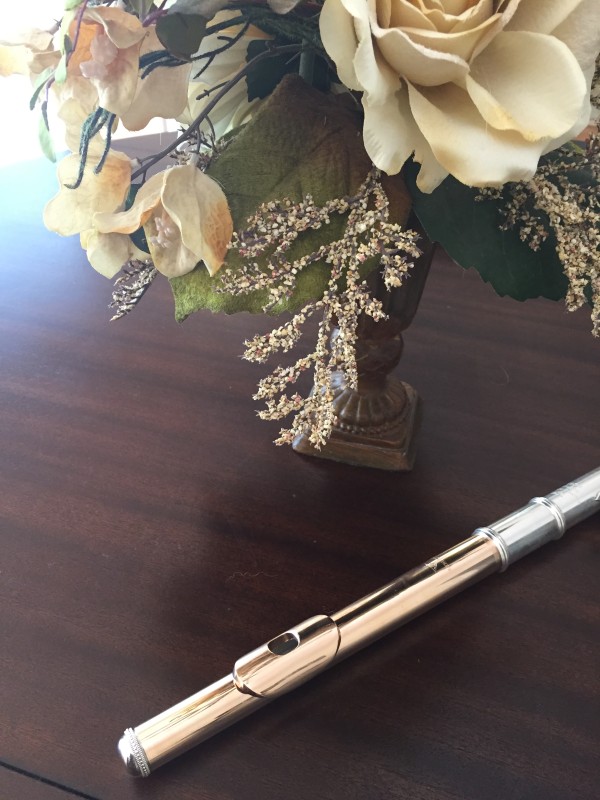
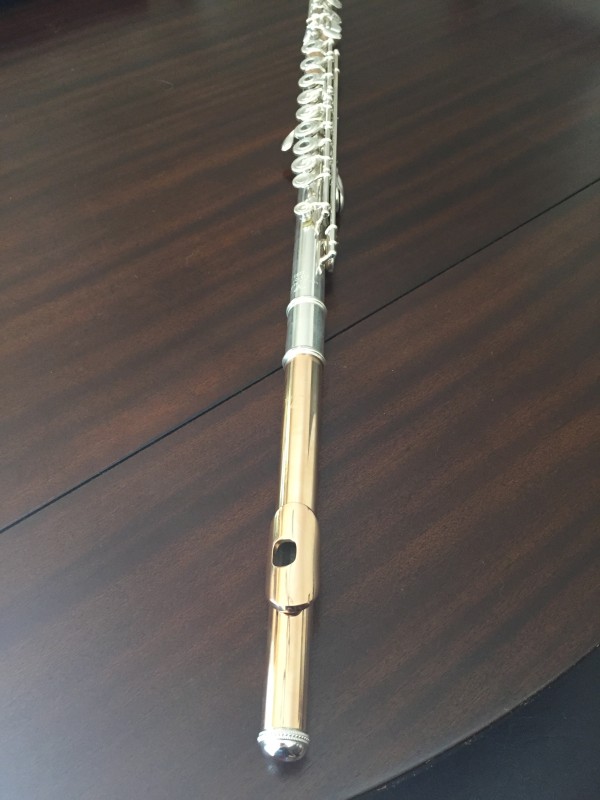
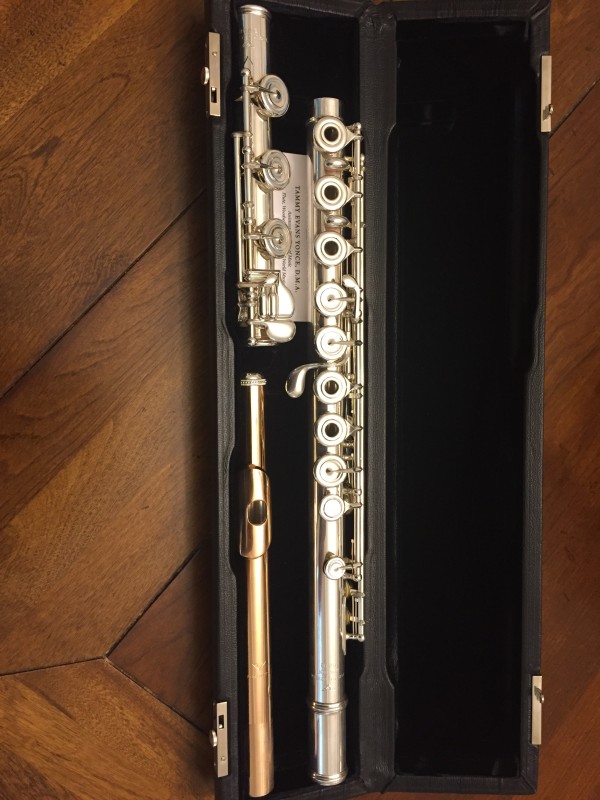
The flute trials are over. Recently, I bit the bullet and bought a silver handmade Powell flute, and I paired it with a Ruby Aurumite soloist cut headjoint.

Once I decided that I wanted a silver inline handmade Powell, I spent a lot of time trying out different headjoints. I found this to be a time-consuming process because there were aspects of each headjoint that I liked, so I had to be patient until I could get my hands on one that had each of those desirable qualities in the same headjoint. The soloist cut works best for me. Eventually, I narrowed my choices down to a silver, a 9k Aurumite, and the Ruby Aurumite. I played them in different rooms and on various repertoire over a period of time. I recorded myself playing each of them; besides listening to the recordings myself, I sent them to a friend for his opinion. The richness of the Ruby Aurumite sound was what finally won me over, and I decided on that one.

Shortly after making my decision, I performed at the Canadian Flute Convention, and I found that very little transition was necessary from my old flute to the new one. The scale seems to be slightly different, which will take some adjustment, but the mechanism is solid and the tone color potential with the headjoint is exciting.

IMG_0772

IMG_0773

IMG_0774


Flute Trial #1

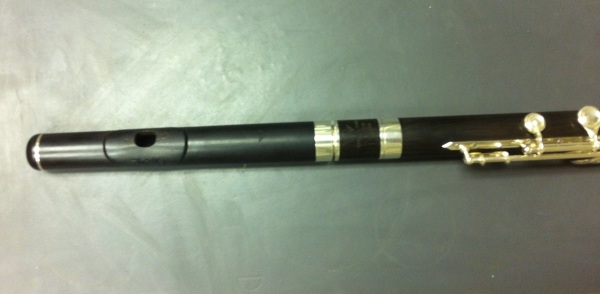
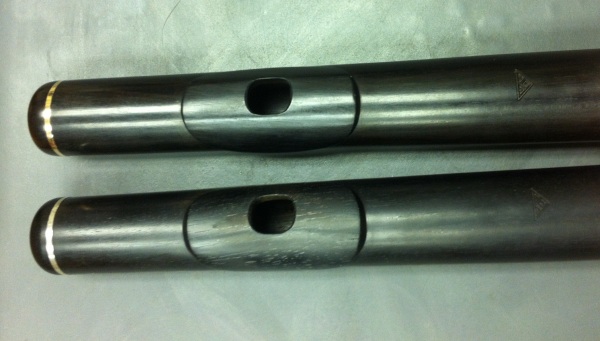
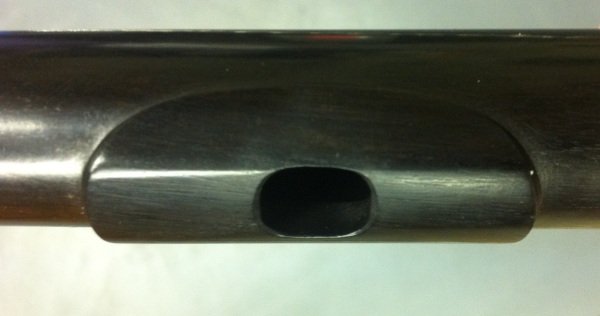
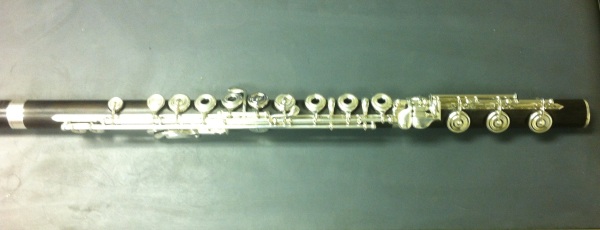
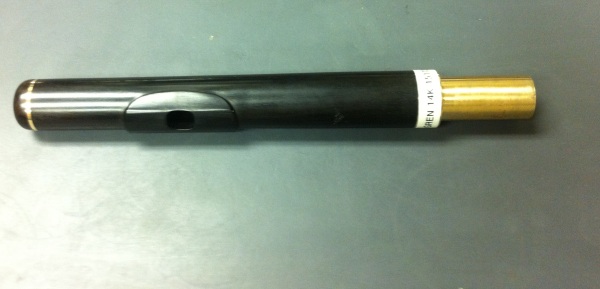
I find myself in the market for a new flute. I’m not in a hurry to purchase, and I plan to try out many different instruments before deciding what I want to go with. This week, I’ve been playing a wooden (grenadilla) flute made by Powell. The mechanism is sterling silver and it has a B foot joint, French cups, and offset G. It’s pitched at A=442. I’ve tried two different headjoints with it this week. My own personal grenadilla headjoint has a sterling silver tenon; I also tried a grenadilla headjoint with a 14k gold tenon. The instrument has a beautiful, warm sound. I did notice a difference in the sound between the two headjoints. However, they seem to be cut slightly differently, so the differences can’t be attributed to material (silver versus 14k gold) alone. It’s a comfortable instrument to play. It does take slightly longer to warm up than a metal instrument — and I only played it for short intervals, as it was only finished a couple of weeks ago — but once it’s warm, it has a lovely sound. This flute is definitely on the short list.


wooden powell
Grenadilla/silver headjoint.
head joints
Comparison of both headjoints.
IMG_1305[1]
Close up of grenadilla/silver headjoint.
lip plate
Close up of grenadilla/14k gold headjoint.
wooden powell2
Close up of sterling silver mechanism.
wooden powell14k
Grenadilla/14k gold headjoint.
IMG_1302[1]
Close up of offset G.


Glissando Headjoint

Flute and Composer Friends,

If you don’t yet know about the Glissando Headjoint, I am happy to introduce you to some of what it can do. It was invented by the flutist/composer/musician extraordinaire Robert Dick, and plenty of information about its conception and eventual construction can be found at other sources. Check out this link for a video demonstration by Robert.

Since buying one of these headjoints a couple of years ago, I am feeling more comfortable and adept at using it. I am happy to have met several people worldwide who also use it, and it has been especially rewarding to have some new pieces written which utilize the headjoint. It is possible to extend the range of the flute downwards, and it produces a true glissando, as opposed to one produced by quickly fingering a descending scale or using the head to bend the pitch downwards.

From the flutist’s perspective, it takes a while to learn the mechanics of the headjoint. It is cut somewhat differently compared to my standard headjoint. Despite the fact that it somewhat resembles a medieval torture device, it is actually quite comfortable to play. The steep learning curve is figuring out how far out the carrier tube has to be extended in order to get the note that is needed. I have found the best way to remember these specific positions is to write reminders in the margins (“Nearly halfway, Fully extended, Very close to home positions,” etc.). Granted, they aren’t precise but they help me remember generally how far the tube must be extended, and then I rely on muscle memory and my ears to tweak. On a side note, working with the glissando headjoint has been the best ear training teacher I’ve ever had. There is an established fingering chart and notation system in place.

Jay Batzner has written a beautiful work that calls for the glissando headjoint, and you can check it out here.

If you are a composer interested in working with me and writing for the glissando headjoint, please feel free to contact me at tammy.yonce at sdstate.edu.

IMG_1286[1]
With the carrier tube in “home” position. In this case, it plays exactly like a C flute. The two wings can be adjusted to fit each player’s face, and those are used to slide the tube.
IMG_1287[1]
With the carrier tube fully extended.
 

Time Off

IMG_0988[1]This month, I did something I haven’t done in recent memory.

I took a vacation.

Now, to be fair, I have gone on vacation in the past five years. But it always included work. I brought a computer and flute along, and felt obligated to keep up with email, practicing, reading, writing, and idea generating. While I enjoyed myself, there was always that pressure to work underscoring everything.

This time, I didn’t bring my laptop along. My flute was in the repair shop but I brought a backup. I brought one work-related book. And of course I had my phone, which kept me tied to colleague-friends.  But most of the projects I have been working on, including my ever-expanding etude project, came to a grinding halt. I spent nearly four weeks away from work, visiting family and friends, and spending the last week on the beach. Living in the middle of the country for the past couple of years has made me realize how much I miss the coast, and it is always a restorative place to visit. There the days run into each other, and the passing of time is marked by afternoon thundershowers, amazing sunsets, and the changing tides. It took a while for me to decompress, but I am more relaxed than I have been in a very long time.

I practiced just a bit but it was when I truly felt like it, and it was for short periods of time. I read just a couple of chapters of my work-related book. I came up with a bunch of new ideas, but they were spontaneously generated. I made a note of them and will work on them later. Instead of the usual type of productivity, I picked blueberries and made a bunch of blueberry syrup. I visited parents, grandparents, brothers, aunts, uncles, and in-laws. My husband and I spent an epic whirlwind couple of days with Al Theisen in Asheville, North Carolina; we also had a great time with friends, including Michael Kallstrom, in Kentucky. I visited old high school friends who still live in my hometown. I ate well, including home cookin’ as well as meals at restaurants such as Hugh Acheson’s 5&10, Mary Mac’s Tea Room in Atlanta, and Southern Soul BBQ in Saint Simons Island, GA. I spent time in Athens, GA and St. Louis. I drove through 10 different states. I bought a stack of new books from the excellent bookstore on Jekyll Island, GA. And I spent a glorious week at my favorite place: the Golden Isles of Georgia.

I made my semi-annual trip to the grocery store specifically to buy regional food that I can’t find in the upper midwest. Vidalia onions, honey, muscadine wine, White Lily flour, Cheerwine, Duke’s mayonnaise, pecan rice, cornmeal, and Southern Soul BBQ sauce now fill my pantry until my next trip home.

This post is a departure from the usual, but so was this month. And guess what? The world is still spinning, my career still seems to be intact, and I am refreshed and ready to jump back in. Maybe I’ll make this vacation-thing a regular occurrence.

Facebook
YouTube
Instagram
Tiktok